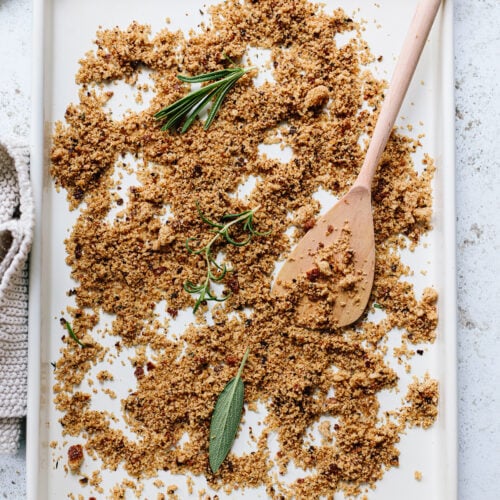
Toasted Homemade Breadcrumbs (Made with Fresh Bread)
These crunchy, savory and super-snackable homemade breadcrumbs are a game-changer! Try making a batch from scratch. Elevate any dish with a finishing touch, sprinkled on everything from pasta, salads, roasted vegetables and more.
Ingredients
- 4 ½-inch (200 g) slices fresh sourdough (7-8 ounces total) or other type of crusty bread
- 2 tablespoons (30 ml) extra virgin olive oil
- 2 tablespoons chopped fresh herbs such as rosemary, thyme, oregano or 1 teaspoon dried herbs
Instructions
Yield: About 1 cup
- Preheat the oven to 400 (200C) degrees
- Brush the bread slices on both sides with the olive oil. Arrange them on a baking sheet.
- Put the baking sheet in the oven to toast the bread for 5 minutes. Flip the slices over and toast 5 more minutes.
- Remove the bread to a cutting board and let them cool a few minutes. When they feel cool enough to touch, cut into approximately ½-inch cubes. Spread the bread cubes in one layer on the baking sheet. Lower the oven temperature to 300 degrees.
- Put the baking sheet back in the oven 10-12 minutes, stirring them around halfway through, until are golden brown and feel dry. Cool 10 minutes.
- Transfer the bread cubes to a food processor. If you like, add the herbs to make seasoned breadcrumbs. Pulse to form crumbs about the size of small pebbles — it's okay if some of the crumbs are larger than others (they're rustic!). Try not to pulverize the crumbs to a powdery dust.
- Transfer the breadcrumbs to a sealed container. They'll keep 1 week at room temperature. 1 month refrigerated and 3 months in the freezer.
Notes
- Best types of bread for breadcrumbs: Use your favorite crusty bread such as sourdough, ciabatta or country-style, either from a homemade loaf or from a local bakery. Look for a good, sturdy crust and open, airy structure inside. Dense white bread such as sandwich bread isn’t recommended because the crumbs can be too gummy.
- Use a larger baking sheet or multiple ones to double or triple the recipe. Process the crumbs in batches, depending on the size of your food processor.
- Make breadcrumbs without a food processor: Put the dry, toasted bread cubes in a heavy-duty plastic zipper bag (or double them up). Bash the cubes using a potato masher until the bread is broken into crumbs.
- These crumbs aren't meant to be used for breading or deep-frying because their texture isn't fine enough.
Nutrition
Calories: 261kcalCarbohydrates: 3gProtein: 1gFat: 28gSodium: 29mgFiber: 0.3gSugar: 0.3g
